A new heating system is a long-term investment, and understanding the full process helps homeowners feel more confident before any work begins. Whether the goal is better efficiency, lower bills, or replacing an ageing unit, the journey from assessment to final testing involves several important steps. In the middle of this process, many people first search for boiler installation guidance so they can prepare for what follows.
Below is a detailed breakdown of what typically happens, how technicians approach each stage, and what homeowners can anticipate from start to finish.
Assessing Your Current Heating Setup
A technician begins by examining the existing boiler, pipework, and location of key components. This visit helps identify whether the current system can support a direct swap or if a different model would perform better. Important details include radiator performance, water pressure, flue placement, and the type of fuel supply available.
Homes with older systems may need updated pipework or safety upgrades before a new unit can be fitted. During this assessment, the homeowner receives clear explanations of options, model types, and expected benefits for their property size.
Choosing the Right Type of Boiler
Selecting a replacement involves more than just picking a brand. Each home functions differently, and the new unit must match demand. Here are the three main choices:
Combi Boilers
Combi systems heat water directly from the mains and do not require a cylinder. They suit smaller to medium homes where space is limited. Their compact structure reduces installation time and can help improve efficiency.
System Boilers
These units use a separate cylinder but don’t need tanks in the loft. They work well in households with multiple bathrooms and steady hot water needs. They also support higher flow rates, which can benefit families with larger heating demands.
Regular (Conventional) Boilers
Older homes with traditional pipework often benefit from a like-for-like replacement. These systems include both a tank and a cylinder. They fit properties where water pressure is low or where multiple outlets run at once.
A skilled technician will talk through each option with clarity, explaining performance differences, running costs, and suitability based on your home’s unique layout.
Preparing Your Home for Installation Day
Before work begins, the team will outline what to expect on the day. Homeowners may be asked to clear the surrounding area or move small items for safe access. If the replacement requires a new flue position or relocation of the boiler, this will be discussed in advance.
The installation area should be well-lit and ventilated. Engineers also carry protective coverings to keep surfaces clean and reduce dust around the workspace.
Removing the Old Boiler
Once preparations are complete, engineers disconnect the old boiler safely. This includes isolating the gas supply, draining the system, and removing the existing unit. Older installations may involve outdated pipework, corrosion, or rust build-up, which the team handles carefully to avoid unnecessary mess.
Depending on the condition of the system, additional flushing may be recommended to remove sludge or debris before fitting the new boiler. This helps protect the new unit from early wear.
Fitting the New Boiler
The new boiler is positioned, connected, and mounted according to the manufacturer’s guidelines. During this stage, engineers complete several steps:
-
Connecting gas, water, and heating pipes
-
Installing the flue and checking safe ventilation routes
-
Adding filters to protect the new system
-
Updating thermostats or smart controls when requested
The fitting process varies in length depending on whether the boiler is going in the same place or being relocated. A straightforward swap usually takes less time, while moving to a new area involves extra pipework and flue adjustments.
Testing and Commissioning
Once the physical installation is complete, the team carries out full testing. Every connection, component, and safety feature is checked carefully. This includes:
-
Gas pressure checks
-
Water flow rate testing
-
Radiator performance checks
-
Thermostat and control setup
-
Heat output measurements
The engineer also completes all required documentation, including commissioning sheets, warranty activation, and building regulation certificates. This paperwork is essential for long-term protection and proof of proper installation.
Guidance on Using Your New Boiler
A major part of the installation process is helping homeowners understand how their new system works. Engineers explain how to adjust heating controls, set timers, manage energy usage, and recognise early signs of maintenance needs.
Good advice at this stage helps new owners keep their boiler running smoothly and avoid unnecessary issues. This step also builds confidence, especially for those upgrading from older systems.
Aftercare and Maintenance Recommendations
A reliable boiler lasts longer with routine care. Many companies offer maintenance plans or yearly service reminders. A typical care routine includes:
-
Annual servicing
-
Filter cleaning
-
Pressure checks
-
Visual inspections
Keeping up with this schedule supports system performance and helps retain warranty coverage.
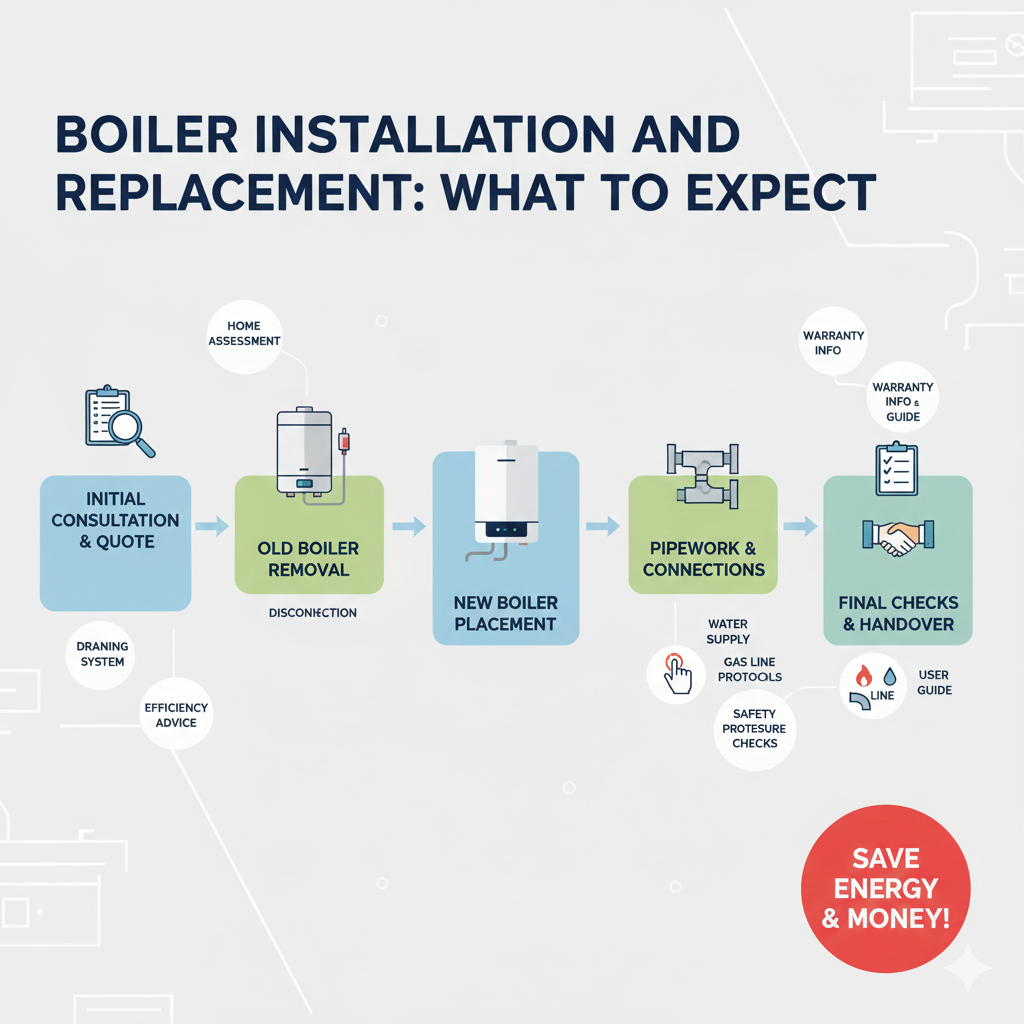
Conclusion
Boiler installation and replacement involve several key stages, each designed to protect the home and deliver a reliable heating system. From the first inspection to the final handover, homeowners receive guidance that helps them understand their options, prepare their property, and get familiar with their new setup. A carefully fitted boiler provides smoother heating, steady hot water, and better long-term performance.